
This is a project that I have been planning to start for a while, I kept putting it off because I wasn't really sure where to start but then I decided - I'll just give it a go.
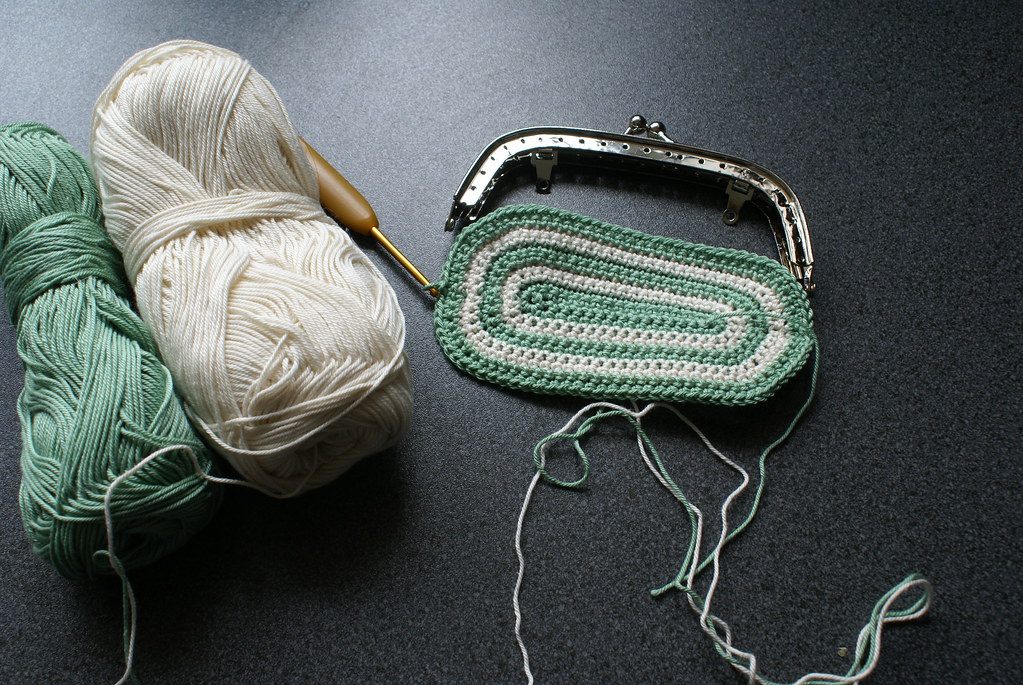
First off I purchased my frame, It's not the smallest frame so the end result is likely to be a bit of a cross between a small handbag and a large coin purse.
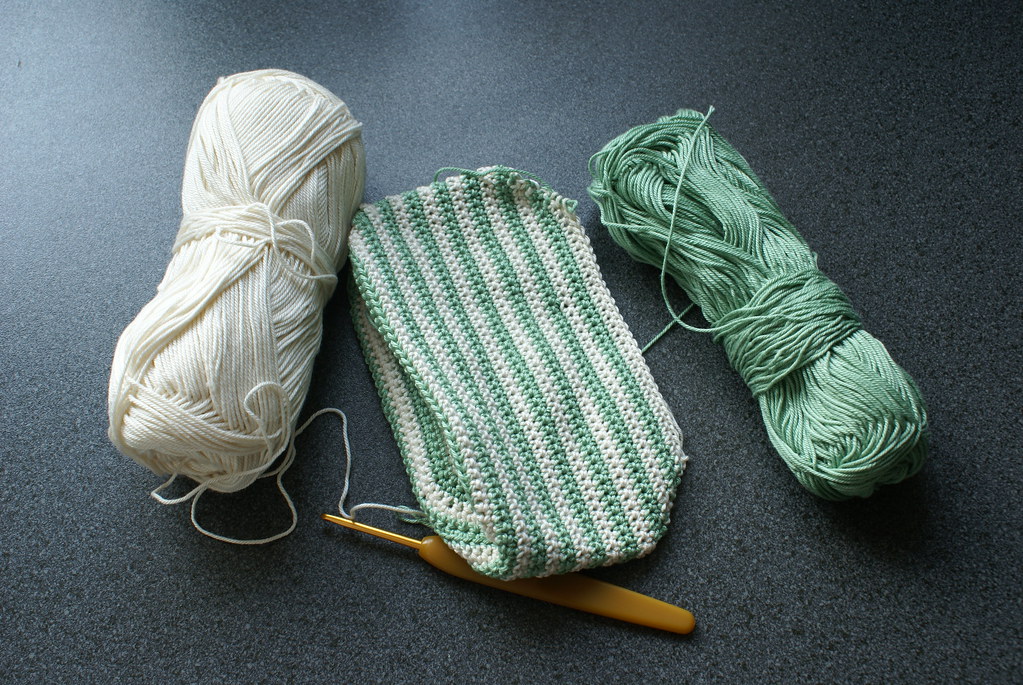
Then the next thing to do is to crochet the bottom. I've chosen to use 100% cotton 4Ply yarn in green and ecru and a 3mm hook.
I decided to create an ellipse for the bottom. To crochet an ellipse just follow these simple rules. (I am using single crochet)
start with the chain length you need, the longer the more elliptical the shorter the more circular your finished crochet will be.
How to create a crochet ellipse:
- On the foundation chain, 2SC into second CH from hook, SC in each chain to the last, 3SC in last CH
- DO NOT TURN but continue to crochet into the back of the foundation chain, SC into each CH to end and 1 more SC into first CH. Then Join with a Slip Stitch.
- Now you have the basis for your ellipse. To continue simply increase by 3 on each end on every row. This means you are increasing by 6SC every ellipse row. The increases should be done visually to keep the curves even. Remember your turning chains and to close every row with a slip stitch.
- Try to not increase in the same stitch every row as this will tend to lead to curling.
For my purse I have created the ellipse so that it is as wide as the widest part of my purse frame.
The next stage is to create the sides of the purse. To start this process I have done a single row where I crochet into the back loop only, then continue rows working into both loops until the purse is as long as I want it.
To explain further, When you look at an SC stitch from above it is a < shape, one half of the < is the front loop and the other half is the back loop. The back loop is the one furthest away from you.
Have a look on the Craft and Yarn Council website for more details. Figure 8 on the "Crochet Patterns - How to read" section shows the front and back loops in a diagram.

At this stage I need to start to decrease the width, so I am crocheting each side individually. I am decreasing a single stitch at the end of each row.
When I have done both sides I will then sew the purse into the frame. Fingers crossed it turns out OK.
The next stage is to create the sides of the purse. To start this process I have done a single row where I crochet into the back loop only, then continue rows working into both loops until the purse is as long as I want it.
To explain further, When you look at an SC stitch from above it is a < shape, one half of the < is the front loop and the other half is the back loop. The back loop is the one furthest away from you.
Have a look on the Craft and Yarn Council website for more details. Figure 8 on the "Crochet Patterns - How to read" section shows the front and back loops in a diagram.
At this stage I need to start to decrease the width, so I am crocheting each side individually. I am decreasing a single stitch at the end of each row.
When I have done both sides I will then sew the purse into the frame. Fingers crossed it turns out OK.
As soon as I saw that clasp, I knew I was going to love this project of yours. As a little girl, I always LOVED snapping those coin purse clasps open and closed, and I have to admit, even as an adult those little clasps are so much more satisfying than a zipper. I didn't know that you could crochet a pouch onto one of those - this is so awesome!
ReplyDelete